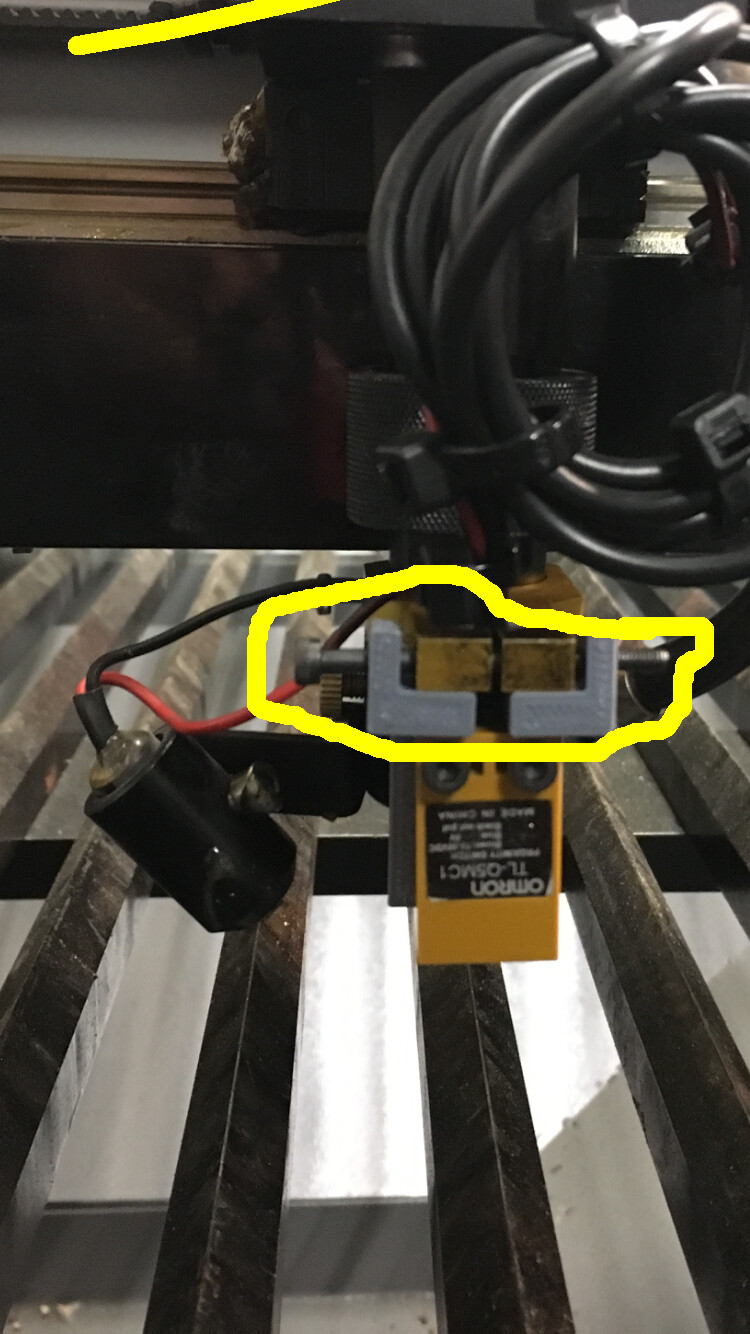
I have mounted the laser sensor to the big laser and it’s untested.
Before the mob comes and beats me for not doing this to their satisfaction remember these things
-
I never saw how this was in a working manner and have no reference to go by outside of the wiki
-
I worked only with what was easily or quickly available to me at the time
-
The Large laser has sat dormant in a “non fully functional” format as long as I’ve been a member…4 months(maybe before this)
-
The Hive is as much a Do-Ocracy as it is a Re-Do-Ocracy but let’s not make this “Undo-Ocracy”
Some things that are definitely “less optimal”(as brad would say).
- The large cable with several zip ties(I’d like to make this shorter with a little slack), Before starting I had no idea how long of a cable I would need so I chose not to cut it at all, so it is untrimmed.
- The large D3 inside the yellow circle is unappealing to me but was what I could find to work with(any ideas the piece uses the same threads as D3)
- The thickness on the plane with two holes for mounting the sensor is too close to the sensor I was unable to mount the sensor with bolts and is instead relying on the threading through the plastic, which I was unaware of this definitely being required prior to starting so I had drilled the holes slightly larger and made through holes(so either editing the model or a reprint but not drilling through holes on this plane will solve the problem, unless we would like to use glue I am open to suggestions).
Some questions?
- Is this mounted to the correct area?
- Seemed like the most logical area1. Is this the correct height?
- Again seemed logical1. Is this particular rotation correct?
Thanks to Ryan, John, Brad and Lorin each having a hand in getting this together.

 As you said there is some room for improvement, perhaps editing the 3D printed piece with some slots for nuts