June 24 CNC class completed successfully, due in large part to Brad’s help in debugging the machine on Friday.
Thanks, Brad!
John2pt0
June 24 CNC class completed successfully, due in large part to Brad’s help in debugging the machine on Friday.
Thanks, Brad!
John2pt0
No problem. Glad we got it working.
I did some digging and found that the pull switches will trip if there is no tension, or too much tension. (which makes sense, if the pull cord is broken the switch should trip)
Basically, the small green O-ring needs to be just showing for the switch to be in the run condition.
I’ll do some basic testing with a continuity tester but I think we need to have reset instructions printed on the side of the machine.
I’m really bothered that the CNC ran with the switch clearly tripped, something seems wrong. I wonder if only one of the switches is examined by the CNC. That would explain a lot.
Hive CNC pullswitch Comepi.pdf (251 KB)
I wonder how sensitive the pair of switches is to the overall tension.
Could the area where the cables rounds each of the 2 corners allow enough friction to unbalance the load,
so that the two switches see different loads when not in the triggered position?
I spent some time tonight after the meeting going over the CNC. The wiring was a bit wonky but I think it is figured out.
I unhooked the wiring from the pull switch on the far side (away from the computer). Now only the pull switch by the computer is functioning. Having the two pull switches setup some annoying reset behavior that made it difficult to return to a safe run state. One would trip the other when you were trying to reset them. The cord is still running around the machine so you can pull it from the three sides.
I adjusted the tension so the connected pull switch has the right tension by default. The little green o-ring is showing when the pull cord is let go. You just have to pull out the small blue plunger on the side of the switch to reset it.
The CNC computer (Mach 3) behaves correctly now. When the cord is pulled the system stops. You can’t reset it on just the computer, you have to pull the blue plunger to reset the switch, only then can you reset at the computer. We can talk about if this is the behavior we want. Perhaps resetting the pull cord is not desired, if so, we would need a different pull switch.
If you hit the reset on the computer that also stops everything, but you can just hit reset on the computer and it will come back online.
I checked the home operations (X and Y) and the auto tool Z, along with the spindle speed control. Everything seems to be working.
I was using the profile with the latest date.
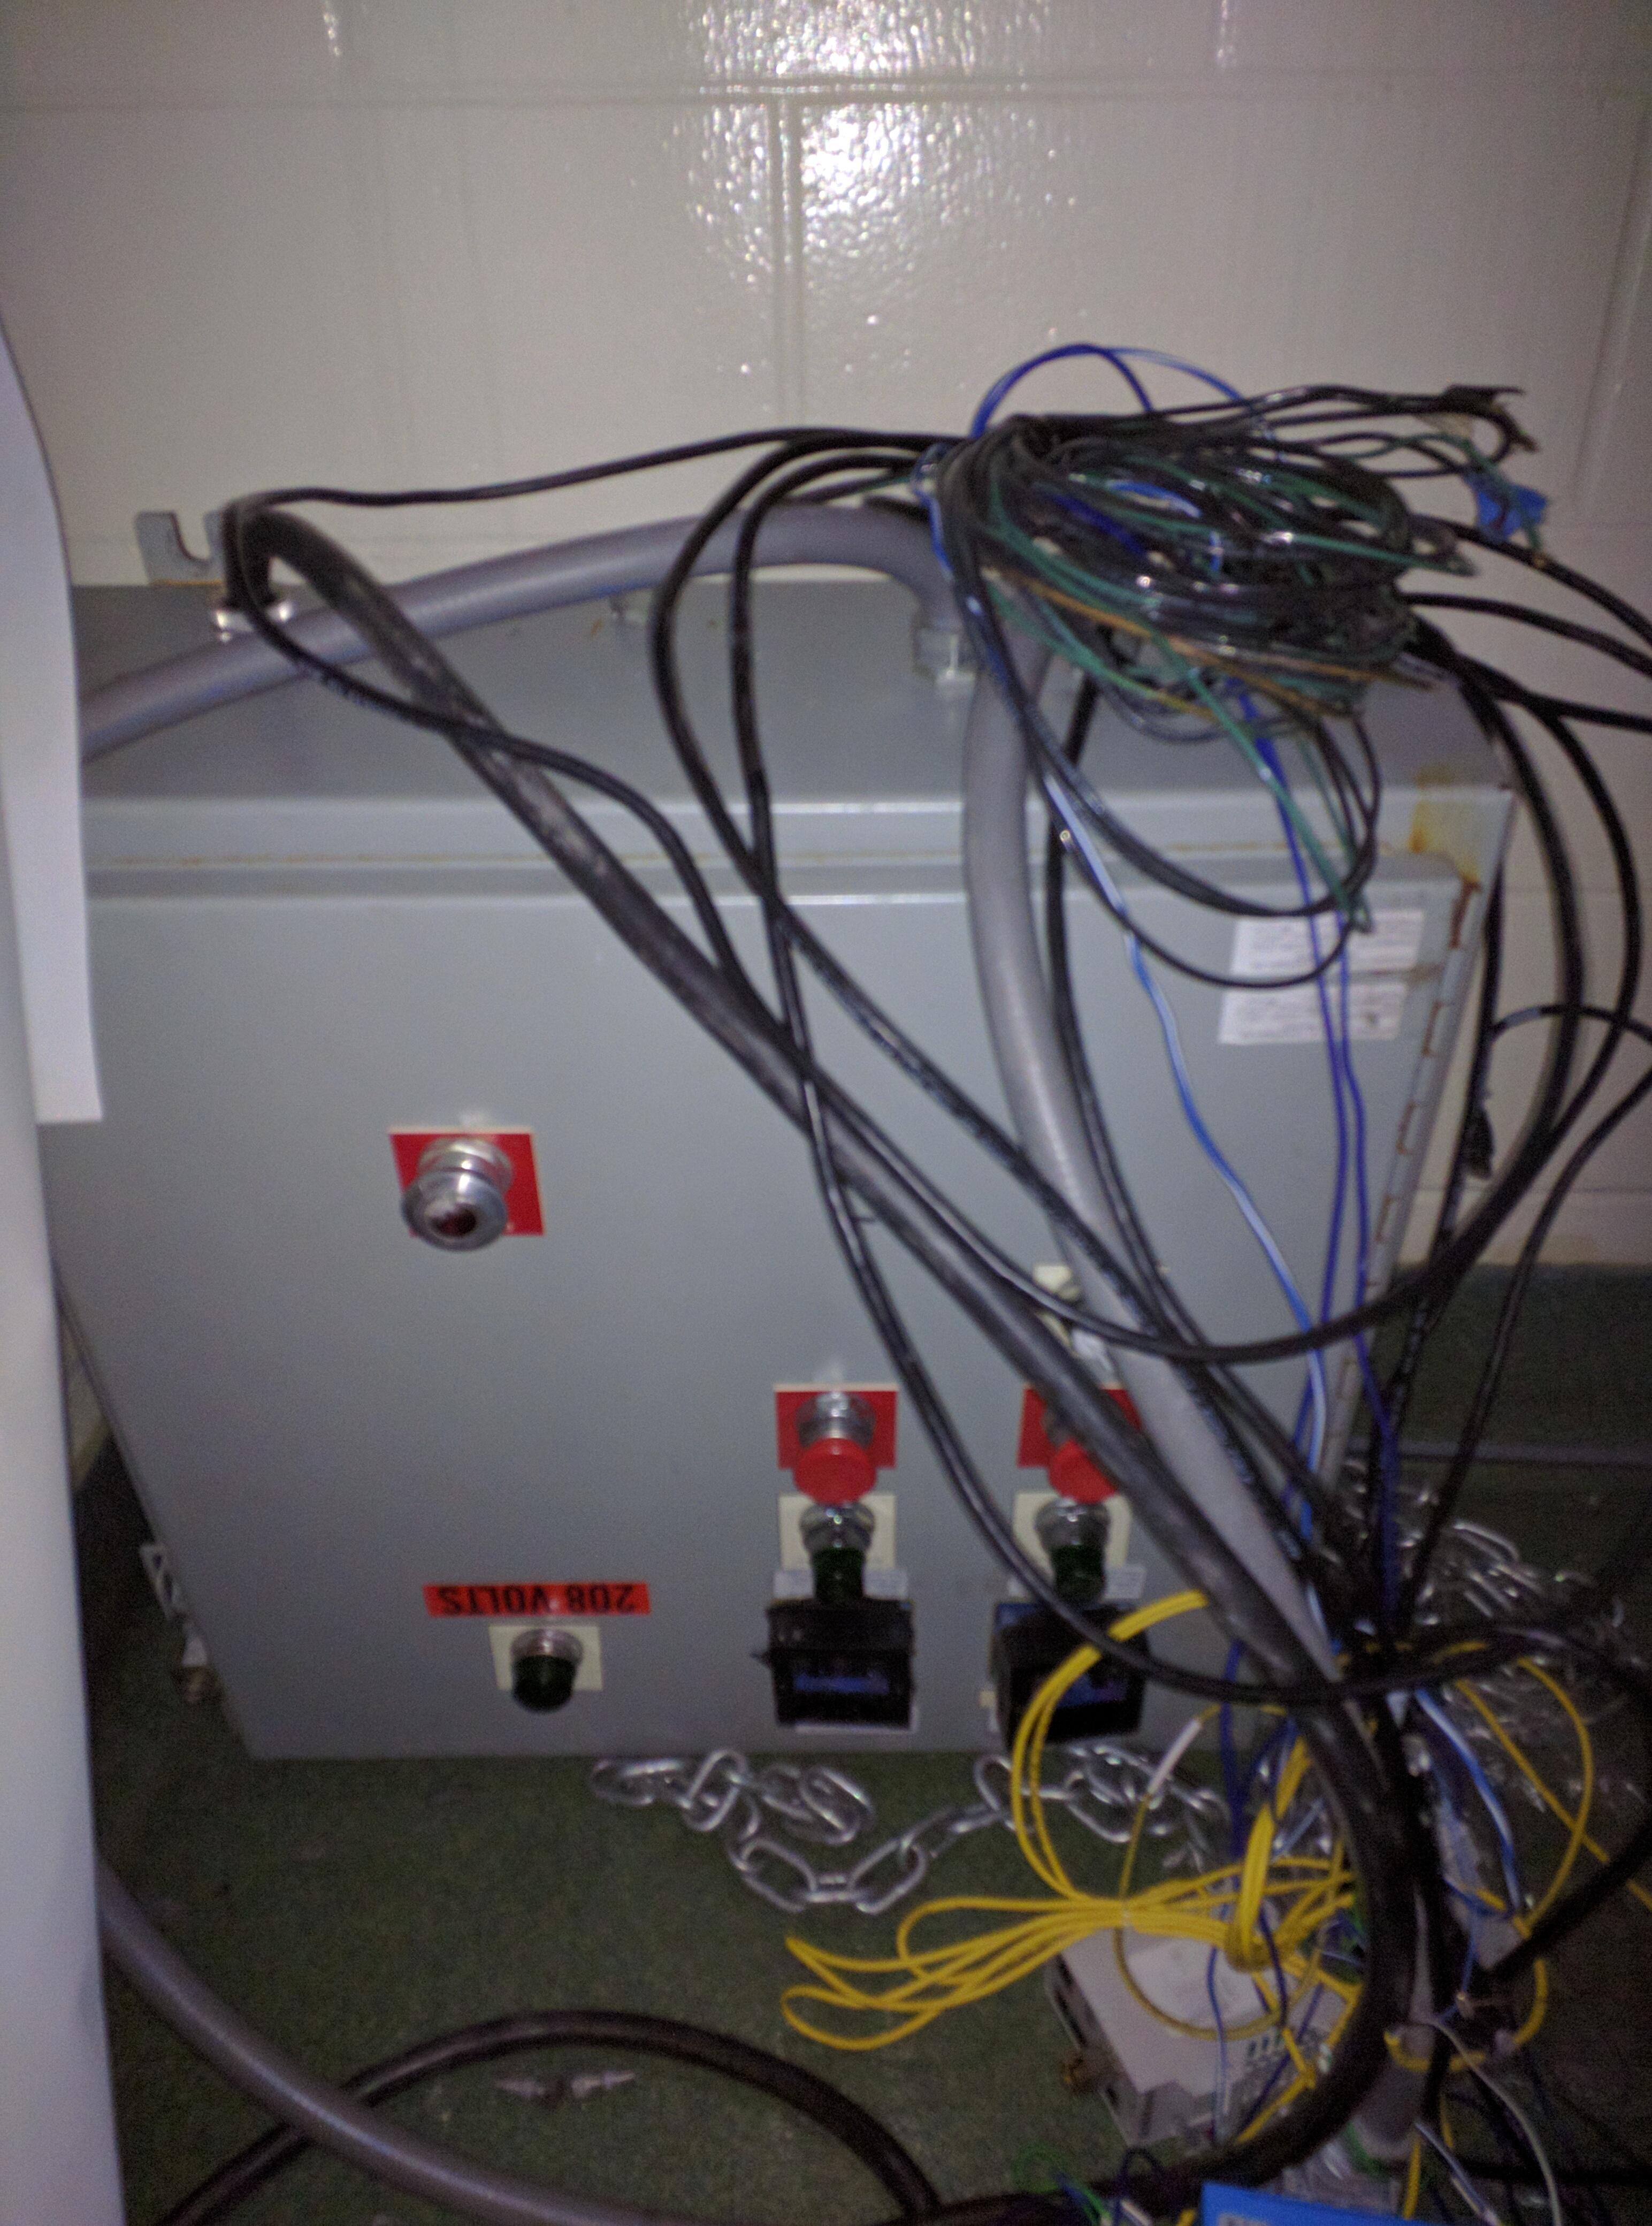
I’m going to try and spend some time on the big CNC to get it a bit more cleaned up. I don’t like the open electrical arrangement. Perhaps a Lexan panel to prevent someone from accidentally leaning into the exposed wiring. ![]()
There is a locking control cabinet with Panduit in it on Facebook. Would be a start at least for wire containment. The vfd could be attached via sealtight conduit to it possibly. Bit of a drive though so might be cheaper to get one from automation direct.
Brad
(Sorry about the prior absent message!)
I like what you describe:
1 trip switch with the cord, requires a pull on the (+X) blue plunger to reset.
Click on STOP responds to an on-screen RESET.
I would leave it like this, such that the cord can be pulled if one is on the wrong side of the router when an emergency stop is needed.
John2pt0
Also like the concept of an enclosure for both of the wiring panels!
John2pt0
We’ll get it figured out.
I have to take my work hat off though. ![]()
I’m thinking a large Lexan panel the same size as the wiring panel offset with standoffs. Should not be difficult.
If I get some time I’d like to label some of the wires. It is difficult to trace anything out, there must have been a wire shortage when they built it. Lots of red used for everything. ![]()
Good times,
Brad
Since we’re on the topic of making it a bit safer, there are plenty of light curtain units on eBay and there are those Pilz safety relays I’m abundance on the rack. May be something to look into to help avoid large moving parts.
https://www.ebay.com/sch/Business-Industrial/12576/i.html?_from=R40&_nkw=light+curtain
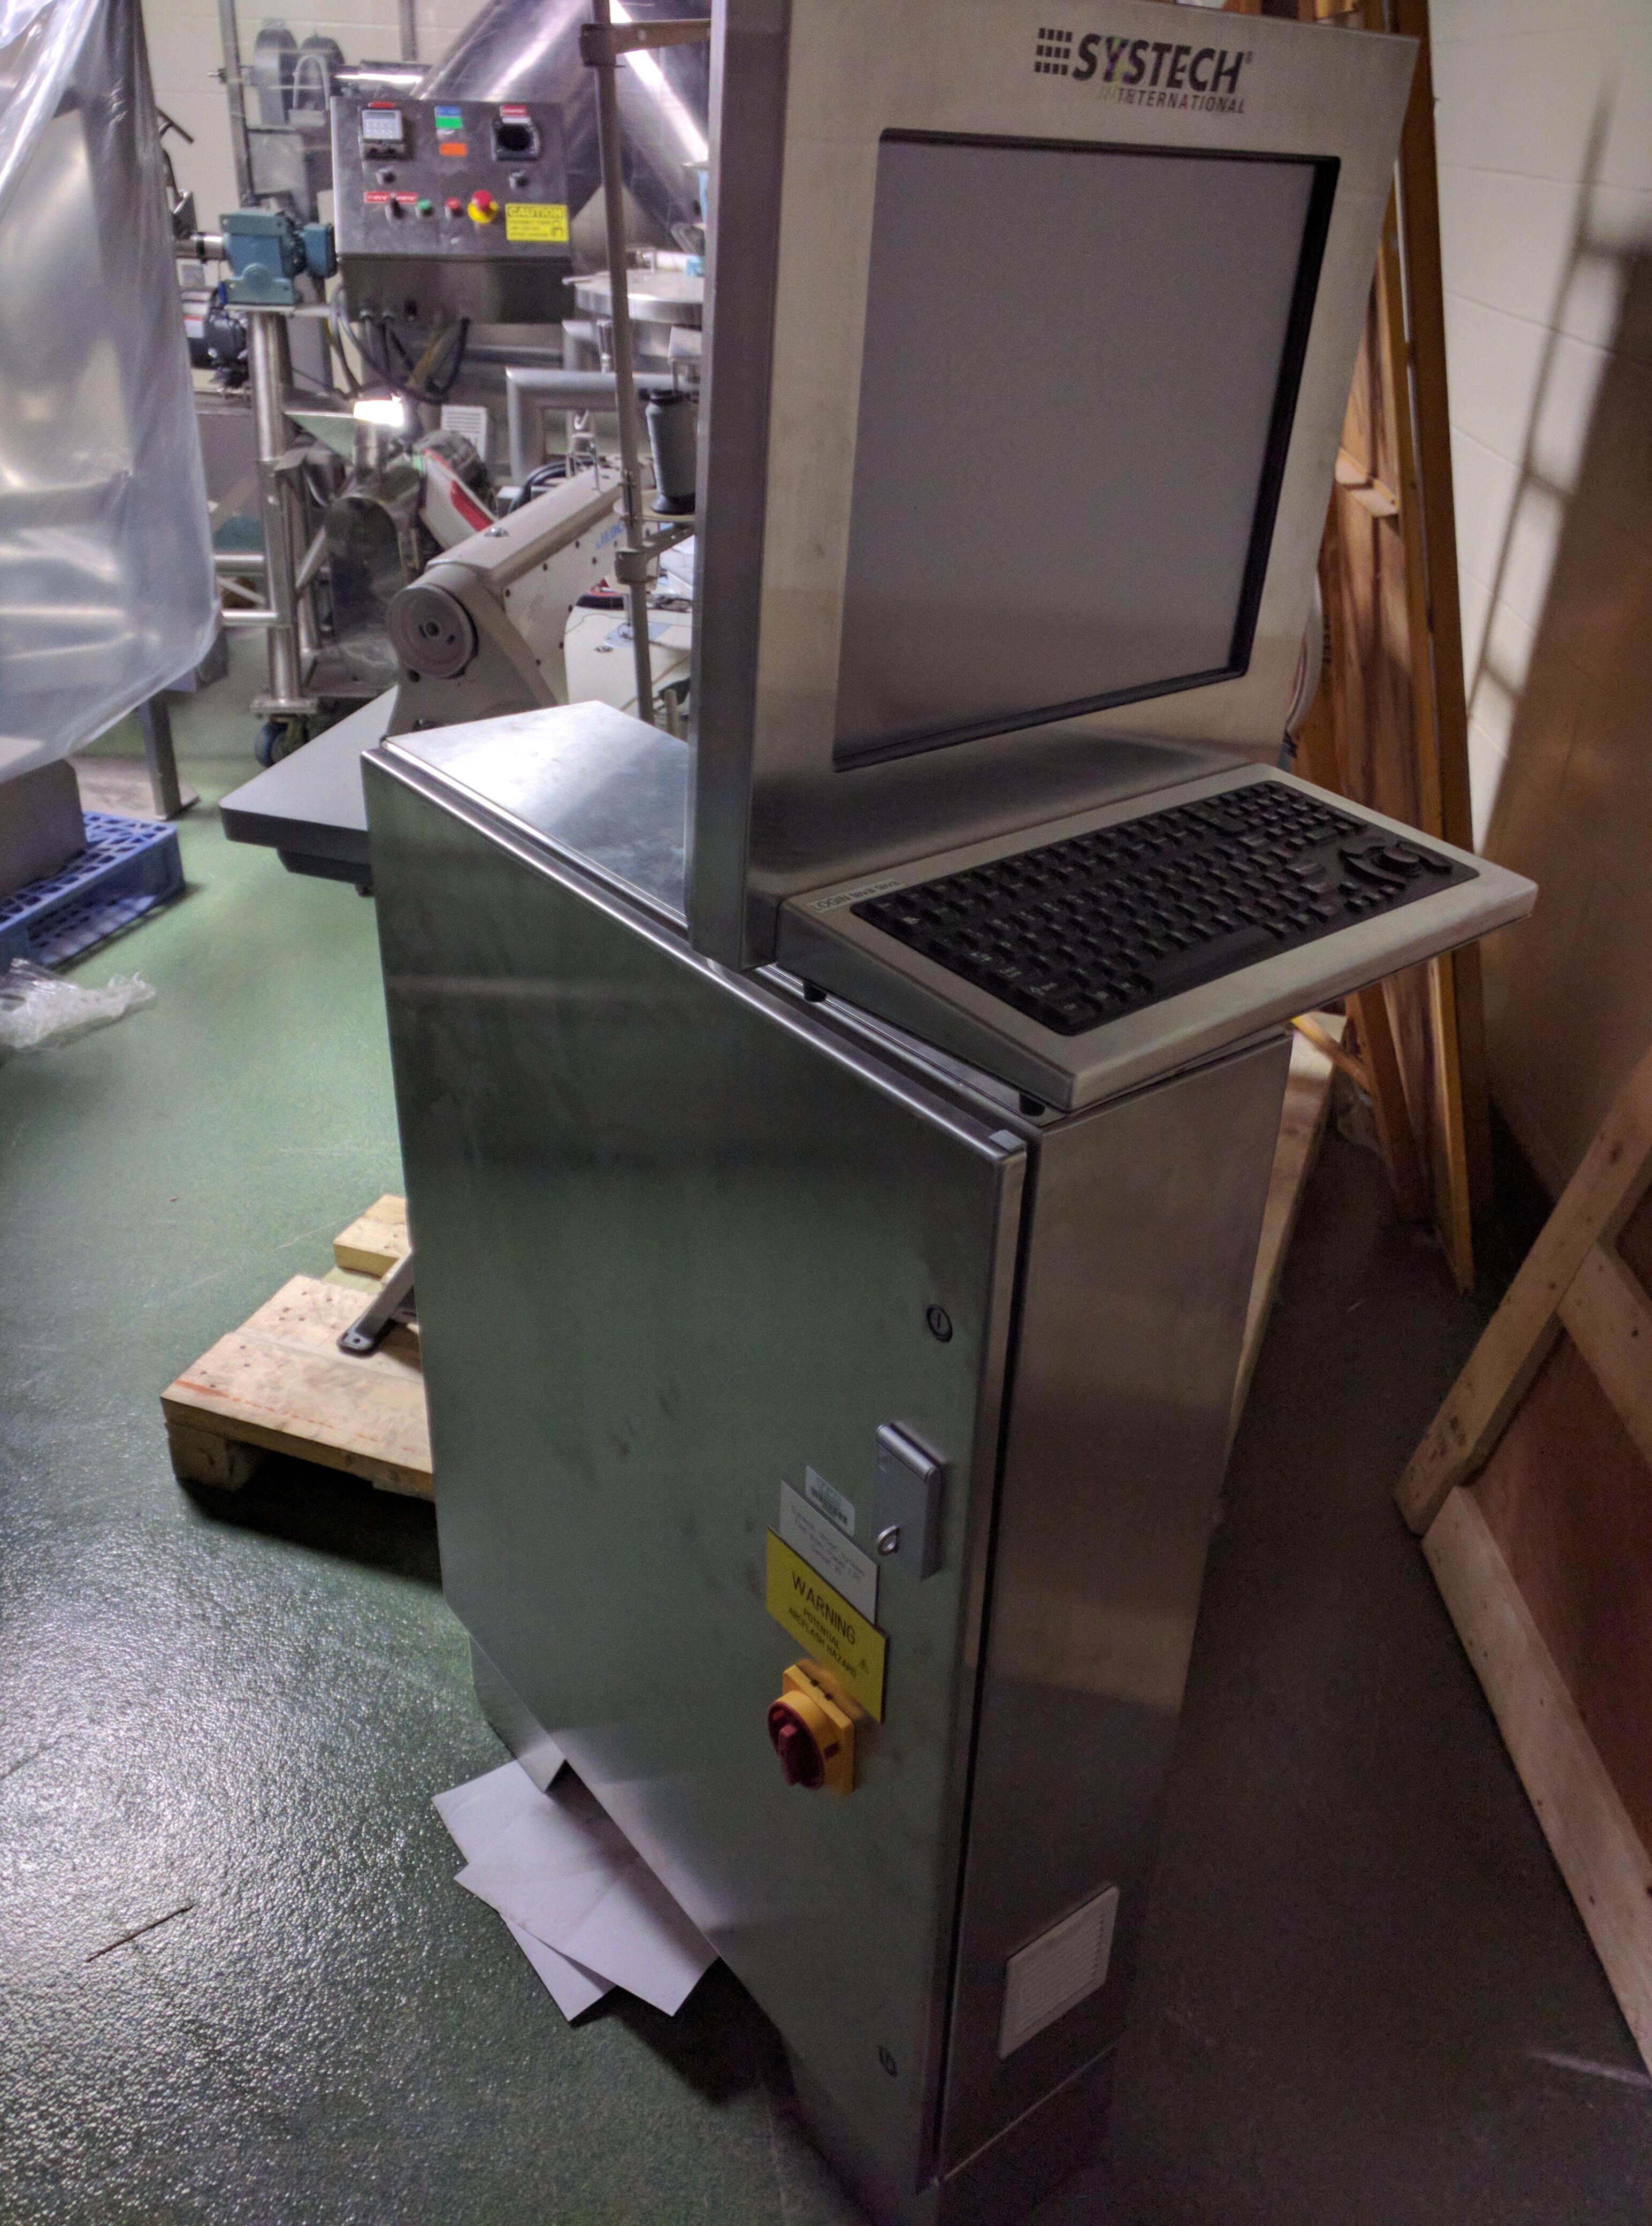
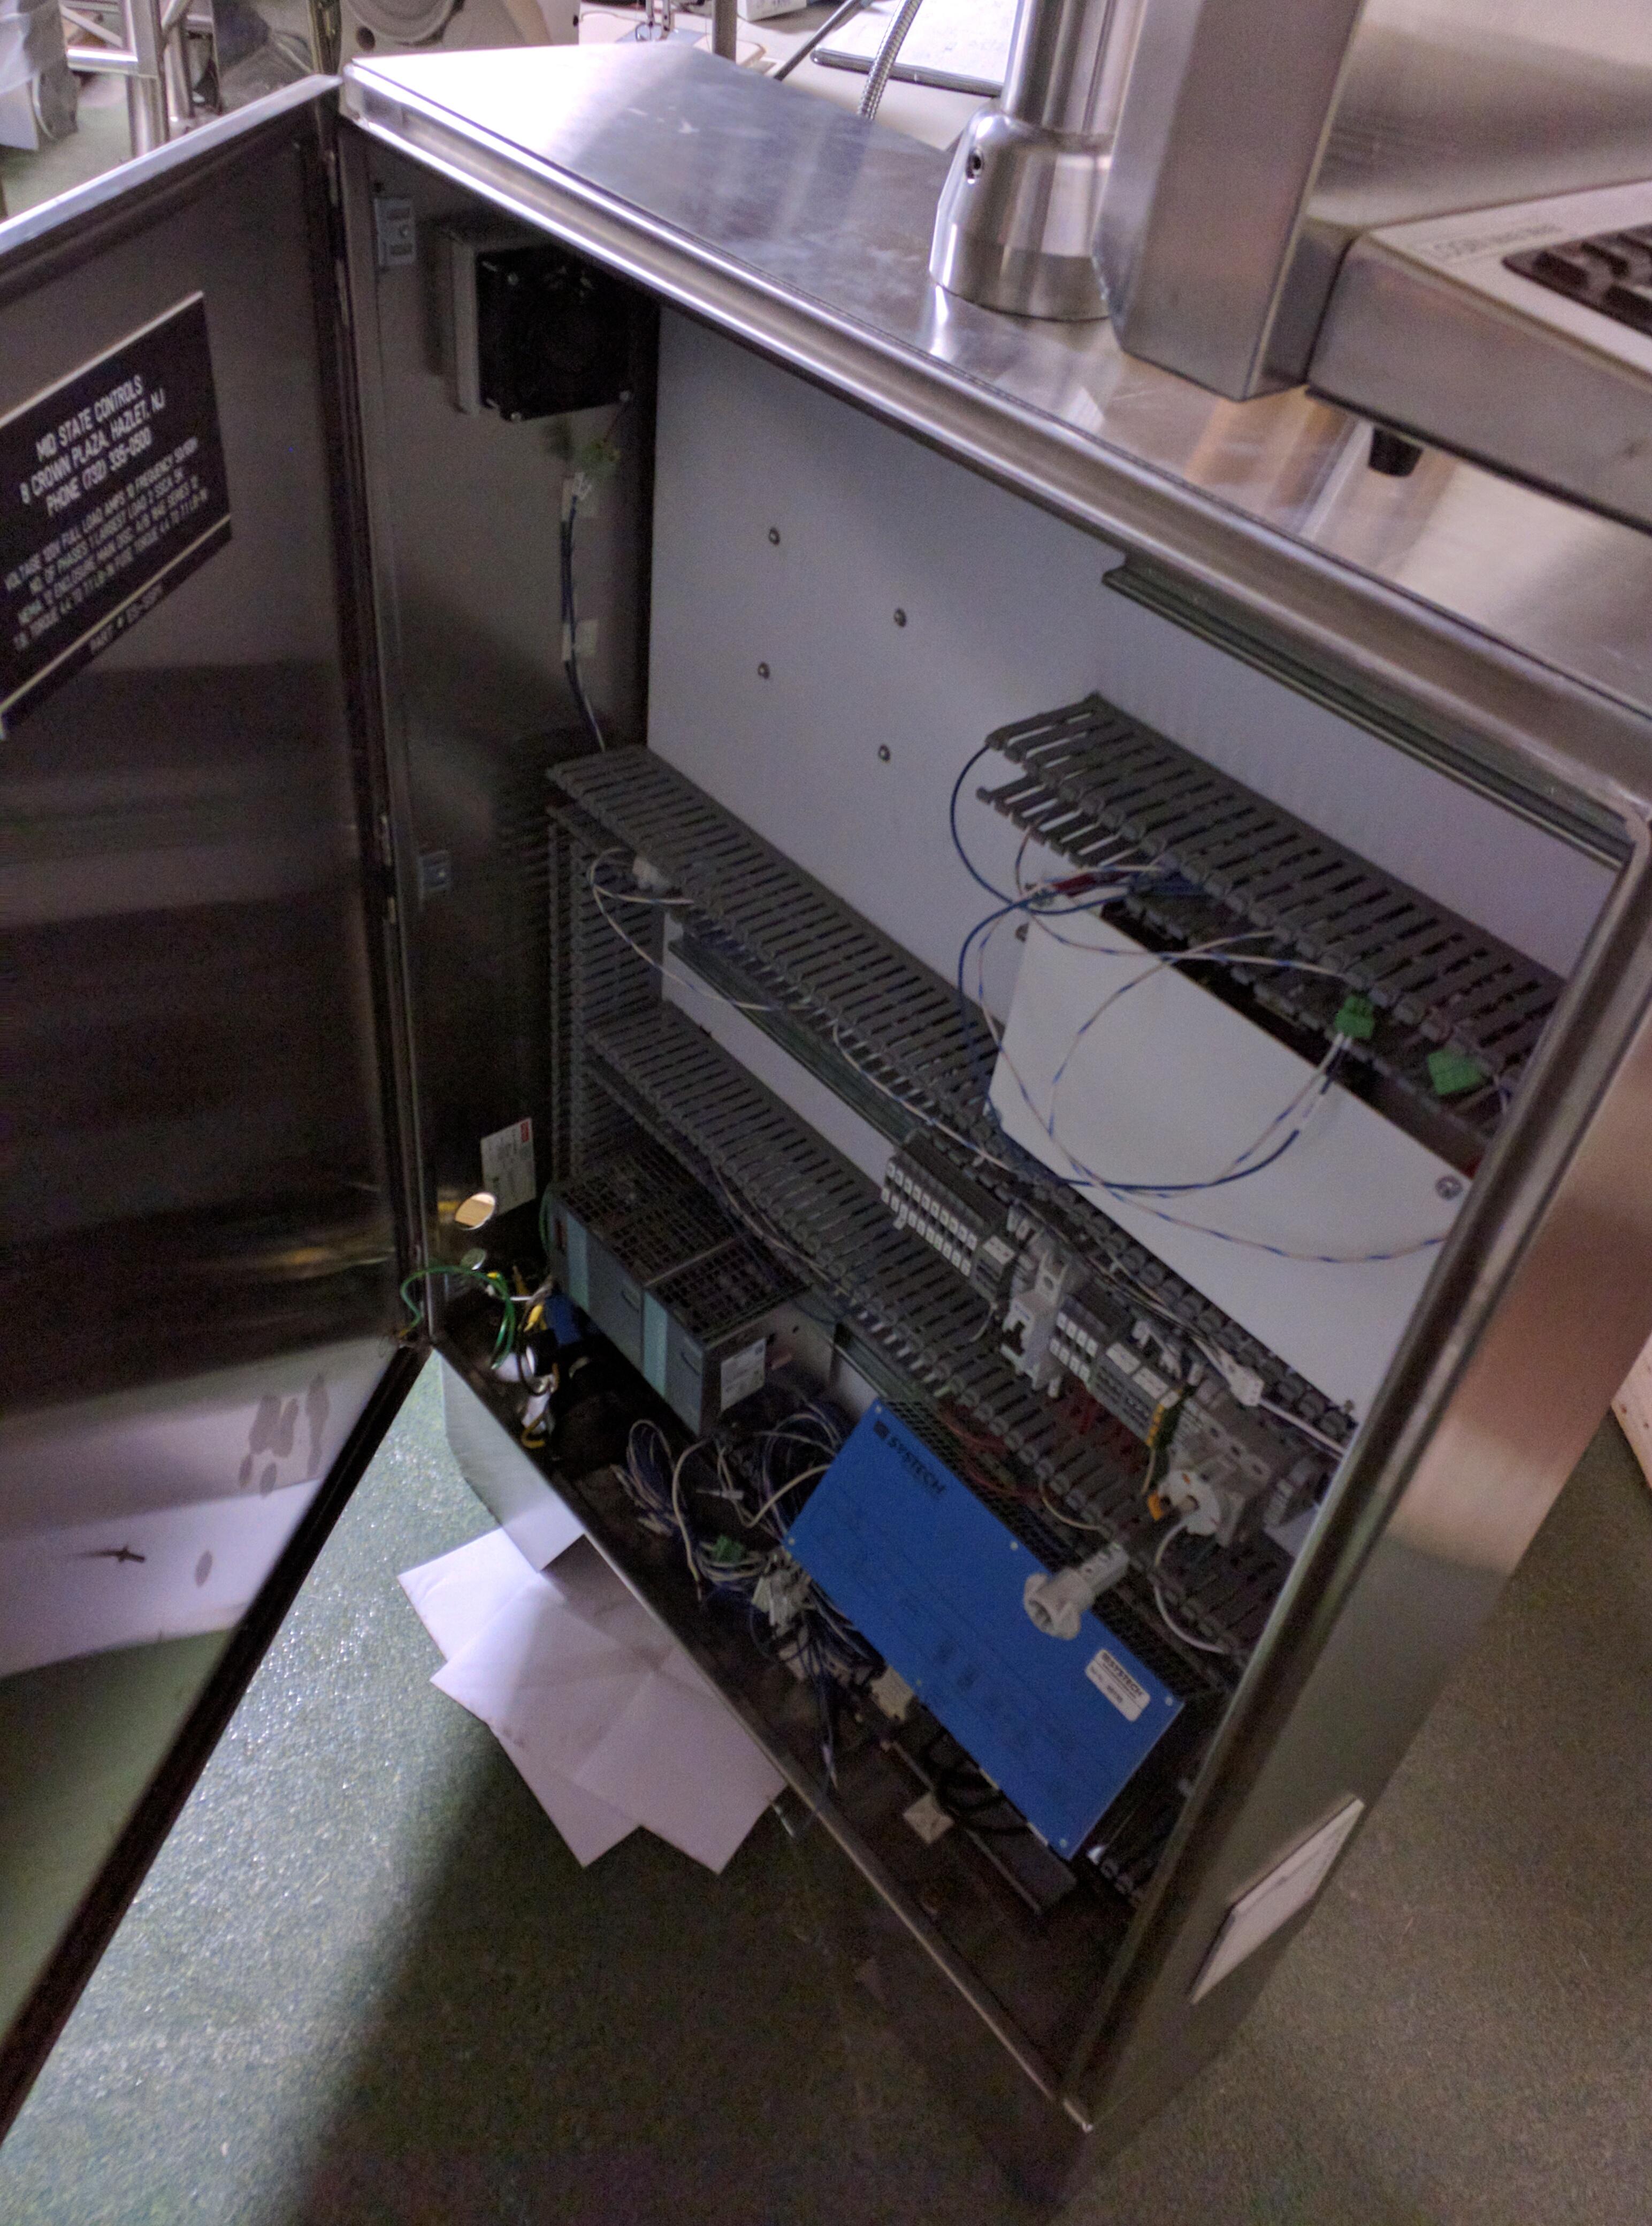
While digging around looking for a computer terminal cabinet I spotted some electrical enclosures that appears to be part of the “To be scrapped pile” wasting away in a dusty corner. The one is a general purpose while the other is a floor mount stainless cabinet with OIT panel and keyboard attached to the top. Which could easily house the pc and good portion of the electrical bits currently exposed. I’ll have to check first with the department head again but if it’s something that could work I’ll try and get it.
If the hives not interested in it, I’d love to get that stainless steel one from you (assuming it’s deep enough). I’ve been looking for a decent electric panel for upgrading my brewery control panel.
Cheers,
Tiffany
I measured both of the cabinets volume. The larger one is a 30"x36"x9" and the smaller is 24"x24"x9". Both have an internal depth to the door of 8.5" so should be enough to mount a number of components both on panel or door. I have permission to remove them from the plant so at least in the interim I’ll move them to the house for safe keeping while it’s under consideration for their use.
Wow! Either would be amazing for me, if you are willing to sell them or trade them to me for something! Id prefer the stainless one if possible, Assuming the hive doesn’t have a good use for them.
Tiff
Brad:
Since we are talking about a new box for the wiring,
would it be worth taking the CNC off line for a short time to rewire it for clarity, visbility and, maybe, electrical shielding?
( I mean, what could possibly go wrong… ; p )
John2pt0
I think the CNC is in the best shape for now.
Once we get an enclosure and a wiring plan we can have a wiring party and swap it over if we want.
My thought was just to add standoffs and put a Lexan sheet to limit access. Nothing fancy. That could be done in a few minutes.
How about baby steps. Let’s do the Lexan piece first and then look into an enclosure.
Brad
Just as an FYI the stainless cabinet is not wash down rated so it wouldn’t be suitable for wet locations. The smaller one would be a better choice as it could be mounted up high on a wall due to the mounting tabs.
Baby steps sounds good to me!
I went in Friday afternoon and adjusted the tram of the spindle. It is pretty squared up and ready to surface to spoilboard. I made some test cuts with the surfacing bit and you can barely tell the edge between two adjacent cuts.
From the Amana website the surfacing bit (RC-2250) should be run at 18,000 rpm and 480ipm.
I think there was some discussion about putting another layer of MDF on top of the current one. We can talk Tuesday.
Brad
Sounding good!
Hope to be there Tues.
John2pt0